
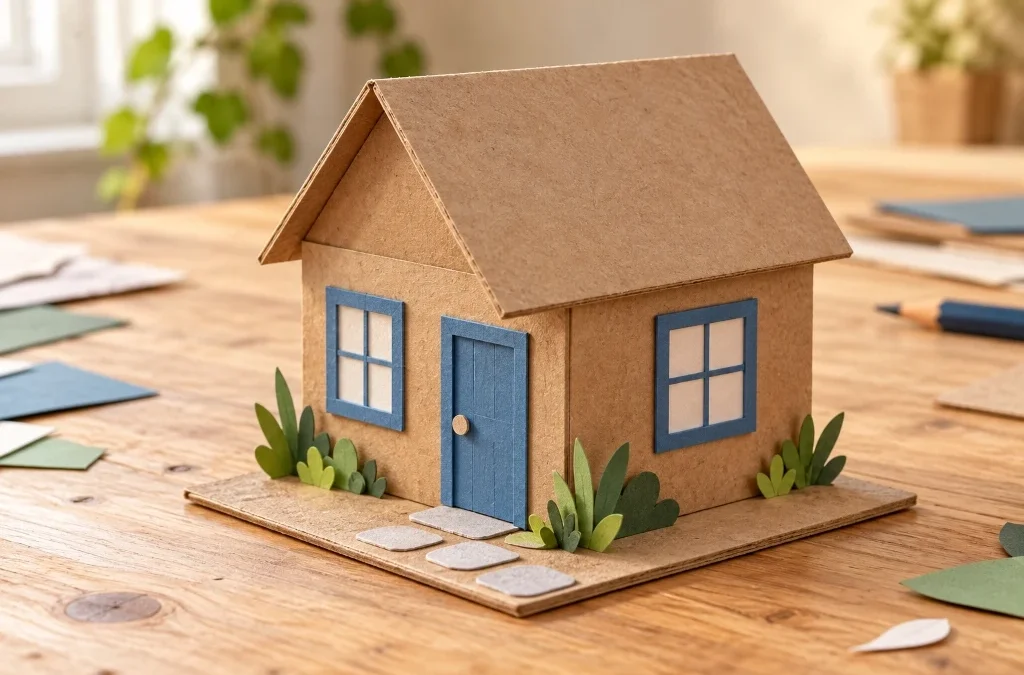
An empty box is easy to overlook. Add a little roof and a blue paper door, though, and suddenly you can imagine someone living there.
That is the idea behind this miniature cardboard house: a small cottage built around a box you already have, with paper details that give it a personality. No elaborate furniture, no tiny staircase, and no need to start with a whole village.
Start with the house. Add the flower garden later.
The basic method: use a small box as the walls, fit a folded cardboard roof over it, then add paper doors, windows, and a base. This guide is a suggested design, not a report of a hands-on build test; fit the pieces to your own box before gluing.
Quick project overview
This is a decorative miniature, not a house for a real animal. The simplest version uses glued-on paper windows, so there is no need to cut openings into the box.
For a first design, choose one main wall colour and one accent colour. Brown cardboard with a blue door is the example here. You can leave the cardboard exposed and make the details from coloured paper.
In this guide: materials, building the cottage, finishing details, troubleshooting, and common questions.
What you need
| Item | What to use it for |
|---|---|
| Small, clean, dry cardboard box | The main house structure |
| Spare card or cardboard | Roof, triangular end pieces, and base |
| Scrap paper | Trying the roof shape before cutting cardboard |
| Coloured paper or thin packaging card | Door, windows, roof strips, and garden |
| Pencil and ruler | Marking folds and checking fit |
| Scissors suitable for the material | Cutting paper and thin card |
| Craft glue suitable for paper/cardboard | Attaching the parts |
| Masking tape | Holding the roof temporarily during fitting |
Townsville City Council’s miniature model-home guide also uses cardboard or thick card, drawing tools, and tape or craft glue. It specifies adult-only use of a craft knife with a cutting mat and safety ruler. If your cardboard needs a knife, have an adult handle that cutting; use paper details instead of cut-out windows for the simpler version. Source: Townsville City Council.
1. Choose the box before planning the details
Pick a box that sits flat, with sides you can use as the front and back. Close any loose flaps and decide which face will hold the door.
Place it on the base card without attaching it yet. Leave enough space in front for a short path. If you want a garden, leave extra room on one side. Reusing clean, sturdy packaging from around the house is a simple, practical habit (much like our guide on running a low-waste kitchen without buying new containers).
Resist the urge to decorate immediately. This is the moment to decide whether you like the shape of the house.
2. Try the roof in scrap paper
Fold a piece of scrap paper in half and open it into an upside-down V. Place it over the box, with the fold running from the front of the house to the back.
Adjust the fold angle and trim the paper until you like the roof’s overhang. Check both sides from the front: does one hang lower than the other?
Use this fitted paper piece as a pattern for the roof card. Thin card that folds cleanly is a practical starting choice. Test the fold on an offcut first, and avoid forcing scissors through material they cannot cut comfortably.
You now have the most recognisable part of the cottage, even before adding a single window.
3. Close the triangular roof gaps
Rest the folded roof on the box and hold it temporarily with masking tape. At the front, there will be a triangular gap between the top of the box and the roof.
Trace that opening onto scrap paper, then test the paper shape in place. Transfer the fitted shape to card and make another for the back. Leave small folding tabs where needed so you have surfaces to glue.
Check both ends separately. A reused box may not be perfectly square, so the first triangle should be a starting pattern for the second, not a reason to force a poor fit.
Attach the end pieces and roof using glue suitable for your materials. Follow the glue manufacturer’s instructions for setting and drying before handling the model.
4. Give the house a front door
Cut a rectangle from blue paper and position it on the front wall. Before gluing, place two paper windows nearby and look at the arrangement from a little distance.
Does the door feel crowded? Are the windows roughly level? Move the pieces around now, while it is easy.
For the window panes, use pale paper with narrow blue strips across it. A small paper circle or a drawn dot can serve as the door handle.
These are decorative surfaces rather than working openings. There is no need to make the project harder just to make it look like a house.
5. Add one detail that tells a story
A model does not need dozens of accessories to feel inviting. Choose one small detail that suggests a person might live there:
- A paper welcome mat outside the door.
- A flower box below one window.
- A little envelope-shaped letter at the doorstep.
- A garden path made from irregular paper shapes.
For the cottage shown in the illustration, try a pale path with green paper planting on either side. Arrange everything loosely before attaching the house to its base.
If you prefer a woodland cabin, swap the blue door for green and keep the garden simpler. The structure can stay exactly the same.
6. Finish the roof without overcomplicating it
You can leave the roof plain. If you want more texture, add narrow paper strips in overlapping rows, beginning at the lower edge and working towards the ridge.
Try one row before covering the entire roof. If the detail feels too heavy for the little house, remove it before the glue sets and return to the plain version.
A finished small project is a perfectly good stopping point. You can build a matching neighbour another day.
When something does not look right
The roof is uneven. Remove temporary tape and check the centre fold and overhang before fixing it permanently. Adjust the roof rather than disguising the problem with more decoration.
The triangular end piece leaves a gap. Make a new paper fitting pattern from the actual opening. Keep adjusting paper until it fits, then cut the replacement card.
The windows look crowded. Try smaller paper windows or fewer of them. Place all the details before gluing any down.
A corner keeps coming apart. Check the glue label for material suitability and drying instructions. A folded card tab inside the joint gives you another surface to attach; test it on that joint before continuing.
The house looks unfinished. Choose one place to improve: the door, the roof edge, or the path. You do not need to add detail everywhere.
Frequently asked questions
Do I need exact measurements?
Not for this box-based design. The box sets the wall dimensions; the paper roof pattern and end pieces are fitted to it. Measure and check symmetry, but avoid copying roof measurements from a differently sized box.
Can I make it without paint?
Yes. This version uses the cardboard’s own colour, with coloured paper for the details. You can also cover individual walls with paper before adding the door and windows.
Can children help?
The paper decorating stage is an option for supervised participation with age-appropriate materials. An adult should handle craft-knife cutting, as the linked council guide specifies. Keep small scraps and tools out of reach of young children and pets.
What should I add next?
Try a tiny garden gate, a paper tree, or a second cottage with a different door colour. Choose one addition and finish it before expanding the scene.
Your first miniature cardboard house does not need to look like a shop-bought model. Give it a roof that fits, a door you like, and one small detail that makes you smile. That is enough to turn a discarded box into a little place with character.
Which would you build: a blue-door cottage, a woodland cabin, or a tiny bookshop?
